Ph: 574-533-9531 (Goshen, Indiana)

Hours: Monday, Wednesday, Thursday – 10 am to 8 pm | Tuesday – 1 pm to 8 pm | Friday- 10 am to 6 pm | Saturday – 10 am to 4 pm

  • TikTok
  • GoodReads

The library is dedicated to providing a wide range of services to meet the needs of our community. In addition to offering extensive collection of books, magazines, and digital resources, the library offers the following convenient services:

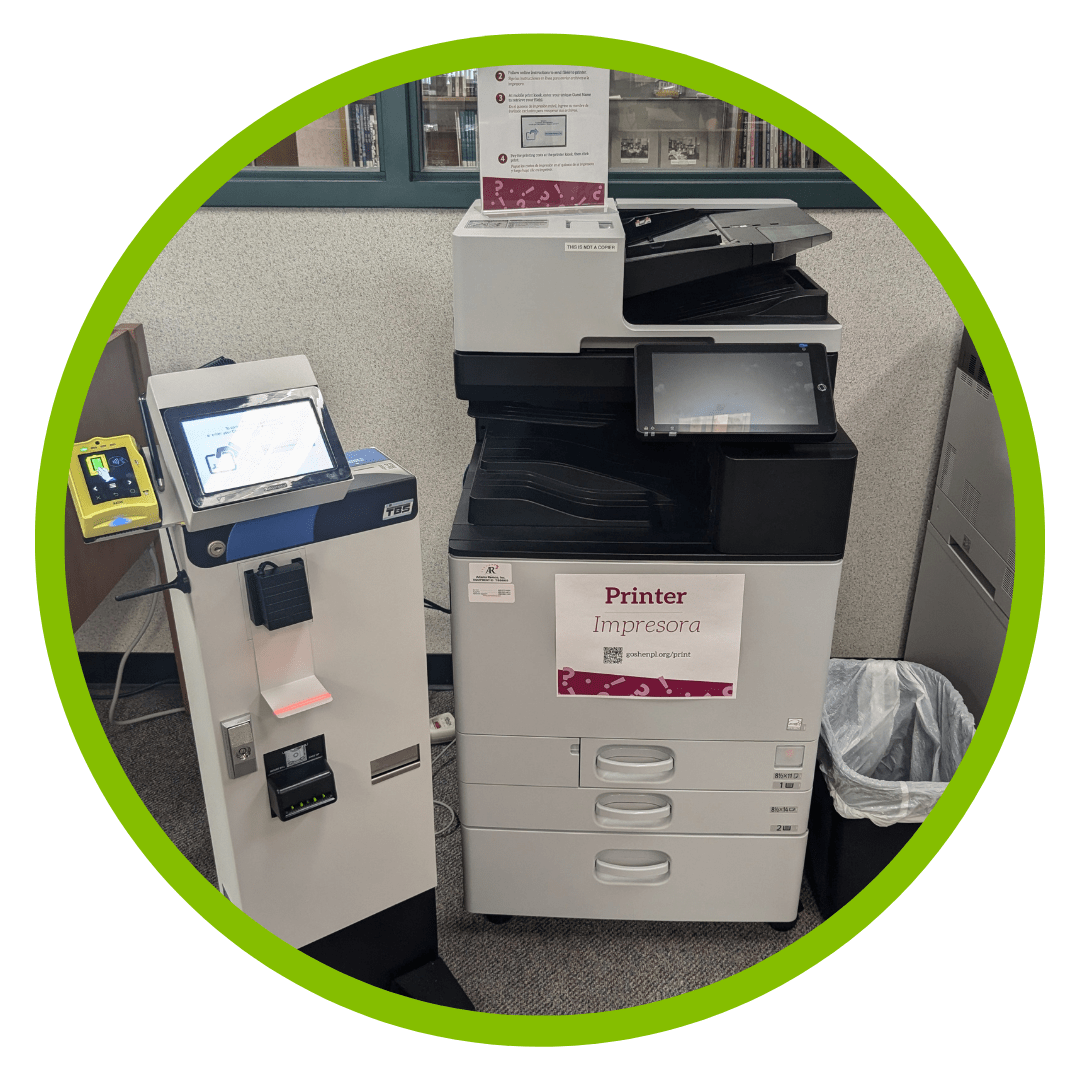
Printing: Whether you need to print documents, photos, or flyers, the library’s high-quality printers are available for most of your printing needs. Plus, with our mobile printing service, you can print from anywhere and pick up your documents at your convenience (within 24 hours).

Paper sizes include:

  • 8.5” x 11” (letter)
  • 8.5” x 14” (legal)
  • 11” x 17” (ledger) – (pricing is double the regular price)

Scanning: Scanning services allow you to digitize important documents and photos with ease, ensuring you have electronic copies for safekeeping. Save your scans to your phone, a USB drive or send them to an email address – all for free.

Copying: The library provides reliable copying services for both black-and-white and color documents, perfect for making duplicates of important papers.

Faxing: Send faxes quickly and efficiently with the library’s faxing services, making it easy to communicate and share documents.
The Library cannot receive faxes. Check with Staples or The Window about receiving faxes.

Our friendly staff is here to assist you with these services.

Below are instructions for the various services that are offered:
Pricing

TypePrice
Black and White copies & prints$.10/page
Color copies & prints$.50/page
Fax (cover page is free)$.50/page
Pay with coins, cash ($1 and $5 bills), credit card,
Apple Pay, Google Pay or Samsung Pay.

  1. Log on to Library PC using your library card or Guest Pass. Guest Passes are available at the Circulation Desk.
  2. Open your file and choose to print in black and white or color. Confirm your print settings and then lock your workstation and go to the Printing Kiosk.
  3. Scan your library card or Guest Pass, pay using the Printing Kiosk, then print your document.

Mobile Printing can happen from anywhere! Try sending your document to the printer from home.

  1. Go to goshenpl.org/print.
  2. Upload your file(s) to the print portal.
  3. Enter your Guest Name or library card number. We recommend the last five digits of your phone number or other number you remember easily. A minimum of 5 characters (numbers and/or letters) is required. Remember this Guest Name to retrieve your print job.
  4. Enter an email address or phone number (optional) to receive a receipt.
  5. Click Submit.
  6. Go to the library Printing Kiosk and enter your Guest Name to retrieve your file(s). Pay, and print your file(s).

Print from Laptop or Computer

Print from Phone or Tablet

To print an email message or attachment:

  1. Simply forward your email to:
  2. Enter the Release Code that you received via email into the Print Kiosk near the printer.
    • Select the print jobs (attachments, email body, etc.)
    • Insert a payment
    • Print jobs

Use the coin-operated black and white photocopier to copy your file(s) or other print materials.

  1. At the ScanEZ station, touch the screen to begin.
  2. Choose whether to scan your document on the flatbed scanner (to the left) or the sheet-fed scanner (to the right). Click Next.
  3. Choose your desired copy settings (color mode, printing duplex, sizing) and number of copies. Click Scan Front Side OR Scan Both Sides.
    • Note: If copying an ID, choose “ID Scan” at the bottom of the screen.
  4. Review the scan and printing costs.
  5. Click Pay Now and pay the payment machine next to the printer with cash, credit, Apple Pay, Google Pay or Samsung Pay.
  1. At the ScanEZ station, touch the screen to begin.
  2. Choose whether to scan your document on the glass scanner (to the left) or the sheetfed scanner (to the right). Click Next.
  3. Choose where to send the scanned file (email, smart phone, One Drive, Google Drive, or USB).
  4. Choose your desired scan settings (file type, color mode, image quality). Click Next.
  5. Place document on the scanner and click Scan Front Side OR Scan Both Sides.
  6. Review the scan and edit as desired (crop, resize, zoom). Click Next.
  7. Enter the required information to send your scan (email address, login information). Click Next.

You can use the ScanEZ station to scan a text document to an audio file.

  1. At the ScanEZ station, touch the screen to begin.
  2. Choose whether to scan your document on the glass scanner (to the left) or the sheetfed scanner (to the right). Click Next.
  3. Click the Audio button on the Select Media screen. Click Next.
  4. Select the desired language for the audio file. Click Next.
  5. Select the destination for the audio file (email, USB, Google Drive, One Drive). Click Next.
  6. Place your document on the scanner and click Scan Front Side OR Scan Both Sides.
  7. Enter the required information to send your file (email address, login information). Click Next.

You can use the ScanEZ station to scan a text document and translate it to another language.

  1. At the ScanEZ station, touch the screen to begin.
  2. Choose whether to scan your document on the glass scanner (to the left) or the sheetfed scanner (to the right). Click Next.
  3. Click the Text Translation button on the Select Media screen. Click Next.
  4. Select the desired language for the translated text file. Click Next.
  5. Select the destination for the translated text file (email, USB, Google Drive, One Drive). Click Next.
  6. Place your document on the scanner and click Scan Front Side OR Scan Both Sides.
  7. Enter the required information to send your file (email address, login information). Click Next.

You can use the ScanEZ station to scan a photograph and make some basic edits.

  1. At the ScanEZ station, touch the screen to begin.
  2. Choose whether to scan your document on the glass scanner (to the left) or the sheetfed scanner (to the right). Click Next.
  3. “Click the Restore Pictures button on the Select Media screen. Click Next.
  4. Select Output Format, Scan Mode, and Image Quality. Click Next.
  5. Select the destination for the translated text file (copy, email, USB, Google Drive, One Drive, printer). Click Next.
  6. Place your document on the scanner and click Scan (or Scan Front Side / Scan Both Sides).
  7. Use the photo editing tools to adjust your image as needed.
  8. Enter the required information to send your file (email address, login information). Click Next.

You can use the ScanEZ station to send a Fax.

  1. At the ScanEZ station, touch the screen to begin.
  2. Click the Fax button on the Select Media screen and click Next.
  3. Select Fax Settings and then click Next.                                                                              
  4. If you select to send a ScanEZ Cover Page and/or receive Email Confirmation, you will be prompted to enter information on the following screens.  (There is no charge for the ScanEZ Cover Page.) 
  5. Place your document on the scanner and click Scan Front Side OR Scan Both Sides.
  6. Review the scan and edit as desired. Click Next.
  7. Enter Fax Number and click Pay Now.
  8. Pay at the Printing Kiosk with cash or credit.